
THE BEST ADVENTURE BIKE MOD COSTS ALMOST NOTHING
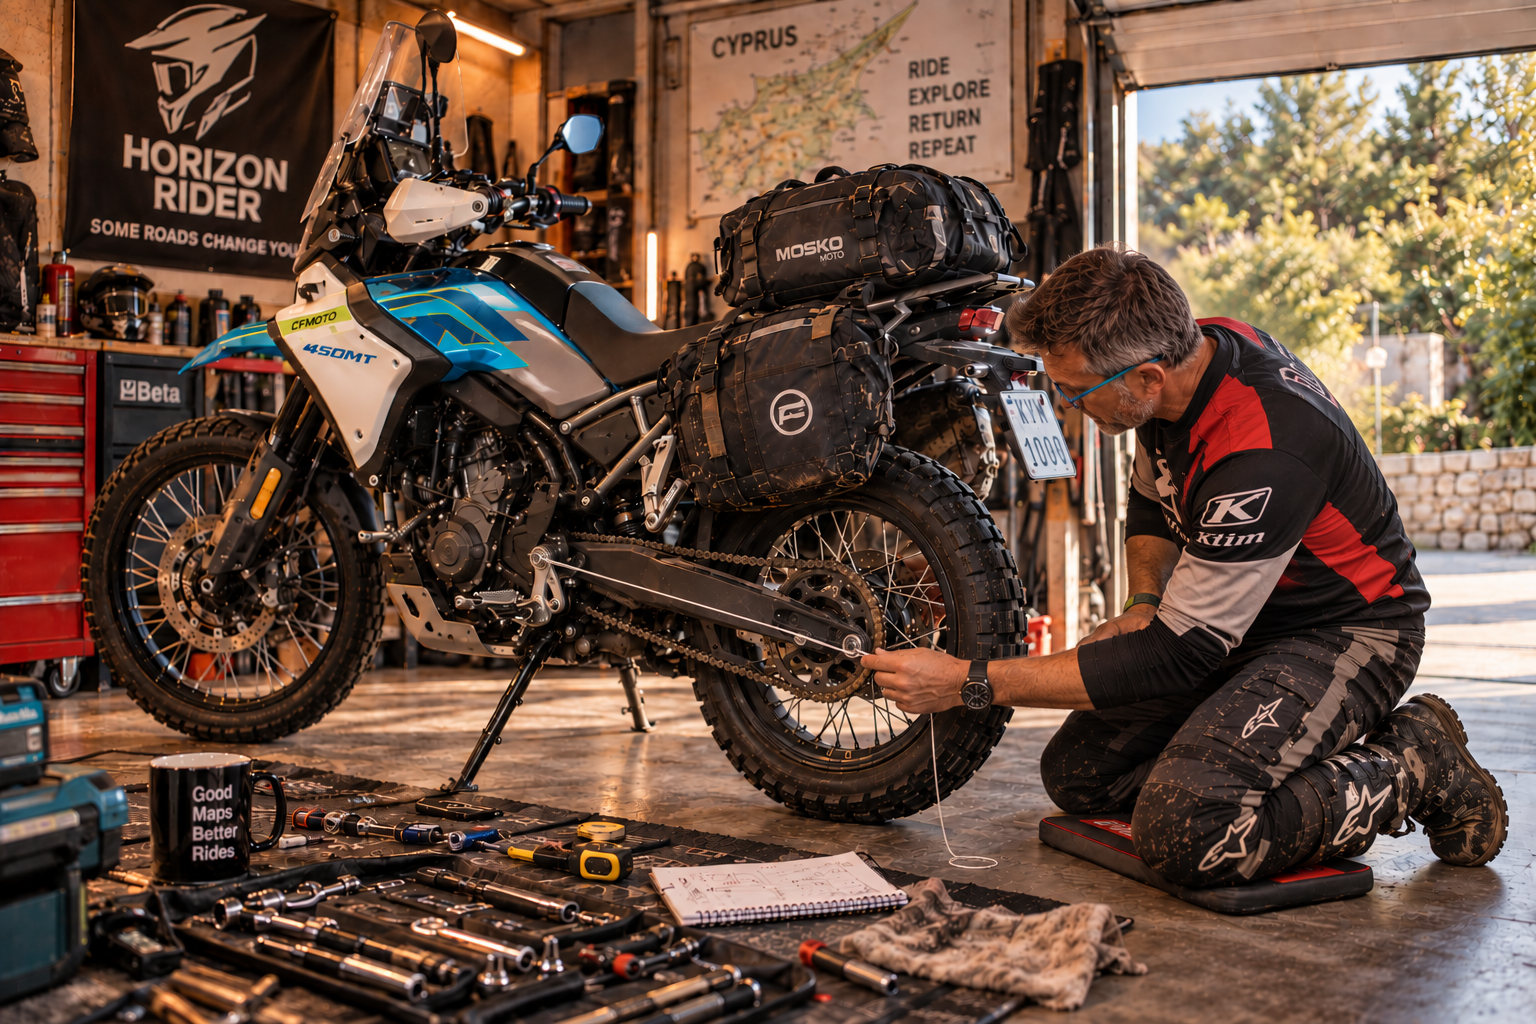
This is the first in what will become a series about setting up an adventure motorcycle properly. And we're starting here because everything else assumes the motorcycle has the correct baseline.
Before you buy anything, set the bloody sag
There are few things adventure riders enjoy more than modifying motorcycles.
I'm as guilty as anybody. We'll spend hundreds on exhausts, thousands on components, argue endlessly about tyres, fit bar risers, change seats and replace perfectly serviceable bits of aluminium with prettier bits of aluminium. We can turn a perfectly good motorcycle into a small engineering project before we've finished the first tank of fuel.
Meanwhile the motorcycle may not even be sitting at the height its suspension and steering geometry were designed to work at.
That can have a bigger effect on how the thing actually handles than almost anything else you do to it. It's the greatest sin a rider can commit on a bike (apart from not training themselves), because it can ruin what is actually a great motorcycle.
I run a motorbike adventure business here in Cyprus and trust me, every single bike that arrives from the dealer gets this treatment immediately. The bikes also get altered weekly as riders depart and new, differently shaped riders appear for the next week. So, before you get any grand plans to modify your bike, there's one adjustment I'd make first.
Set the sag.
I remain staggered by how many people modify adventure motorcycles without ever properly setting the sag. It costs nothing. You can do it at home. And if it's wrong, correcting it may transform the way your motorcycle handles more dramatically than any expensive modification you were about to order.
Sag isn't simply about making the suspension softer or harder. By changing how far the motorcycle settles into its suspension travel when you sit on it, you're also correcting the geometry of the motorcycle so it is ridden exactly as the suspension designer at the factory intended.
Imagine the rear of the bike sagging far too much. The back drops and the front of the motorcycle effectively rotates upwards. The forks become more raked out — exaggerate it in your head and you're heading towards chopper territory.
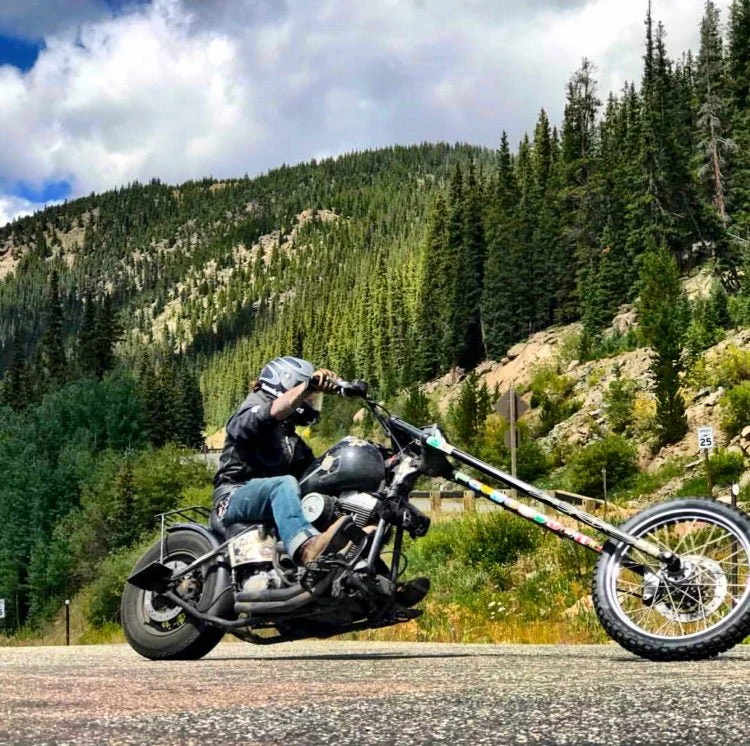
The steering becomes slower. The front will feel vague and woolly, and the motorcycle doesn't particularly want to turn. At the extremes it can be downright dangerous.
Go too far the other way and don't have enough sag, and the rear sits too high. Now the forks become more steeply angled towards the ground, the steering geometry sharpens and the motorcycle can become nervous, skittish and overly eager to turn. This can be a total nightmare, especially on the trails. You hit a rock and the steering immediately overreacts.
And we're not talking about moving the back of the motorcycle six inches.
A surprisingly small error in sag can make a dramatic difference to how the bike handles. Just a few millimetres out and it's no longer operating as designed.
Which is why the first thing I do to every motorcycle we buy is set it properly.
Don't assume the factory did it
I have two CFMoto 450MTs that illustrate this beautifully.
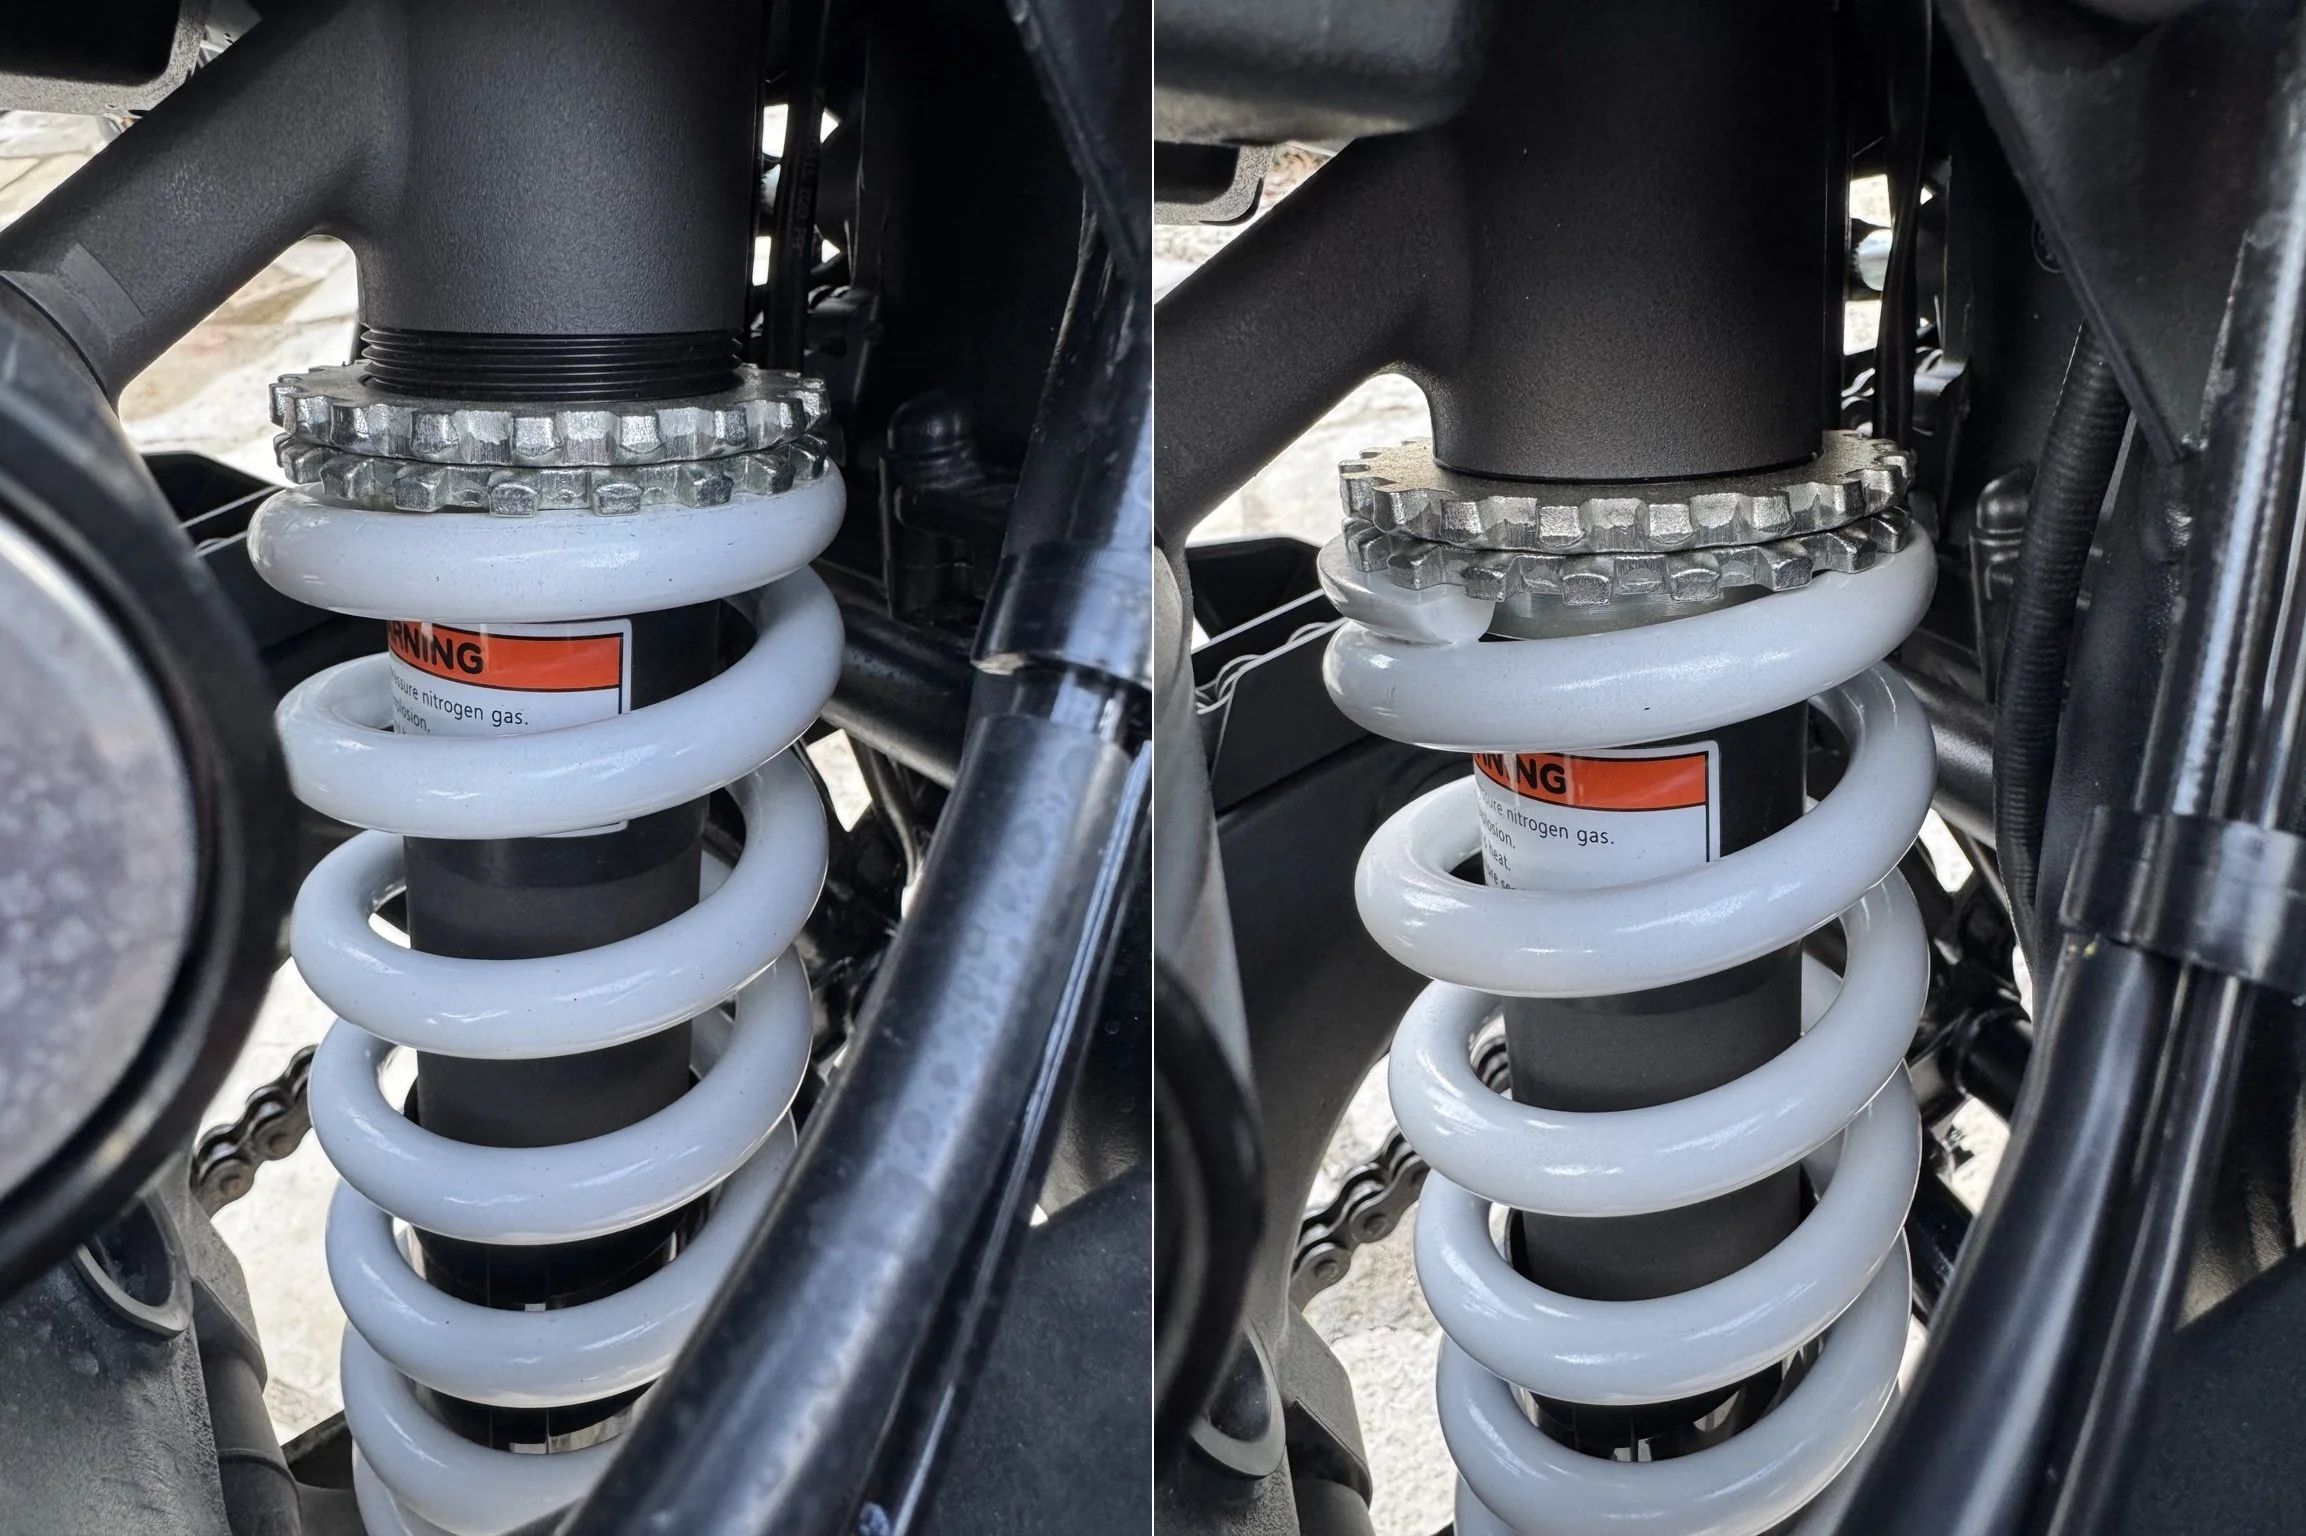
One of the fleet is a 2026 blue 450MT and is correctly set up for me. With my weight (105kg in full riding gear) and our suspension configuration, it takes roughly 3.3 turns of preload to put the bike where I want it.
Then below, I have a photograph of one of our new black 450MTs exactly as it arrived this week.
Zero preload.
Literally none dialled in. They all arrive just like this (just try to ride it, it’s horrible!)
So don't assume that because your motorcycle came out of a factory and passed through a dealer, somebody has carefully adjusted the suspension for you.
Often they haven't. And even if they did, who exactly would they be setting it for?
Most motorcycles have to leave the factory calibrated around some nominal rider — often somewhere around 70 kg. Unless you happen to weigh exactly that in all your riding kit, it isn't necessarily the right setting for you anyway.
Your motorcycle doesn't particularly care what you weigh naked while standing on the bathroom scales.
It cares about the weight actually sitting on it.
That's you, boots, helmet, armour, hydration pack, luggage and whatever else you're taking along for the ride.
Set the motorcycle for the load that actually rides it.
My piece-of-string method — you're gonna love me!
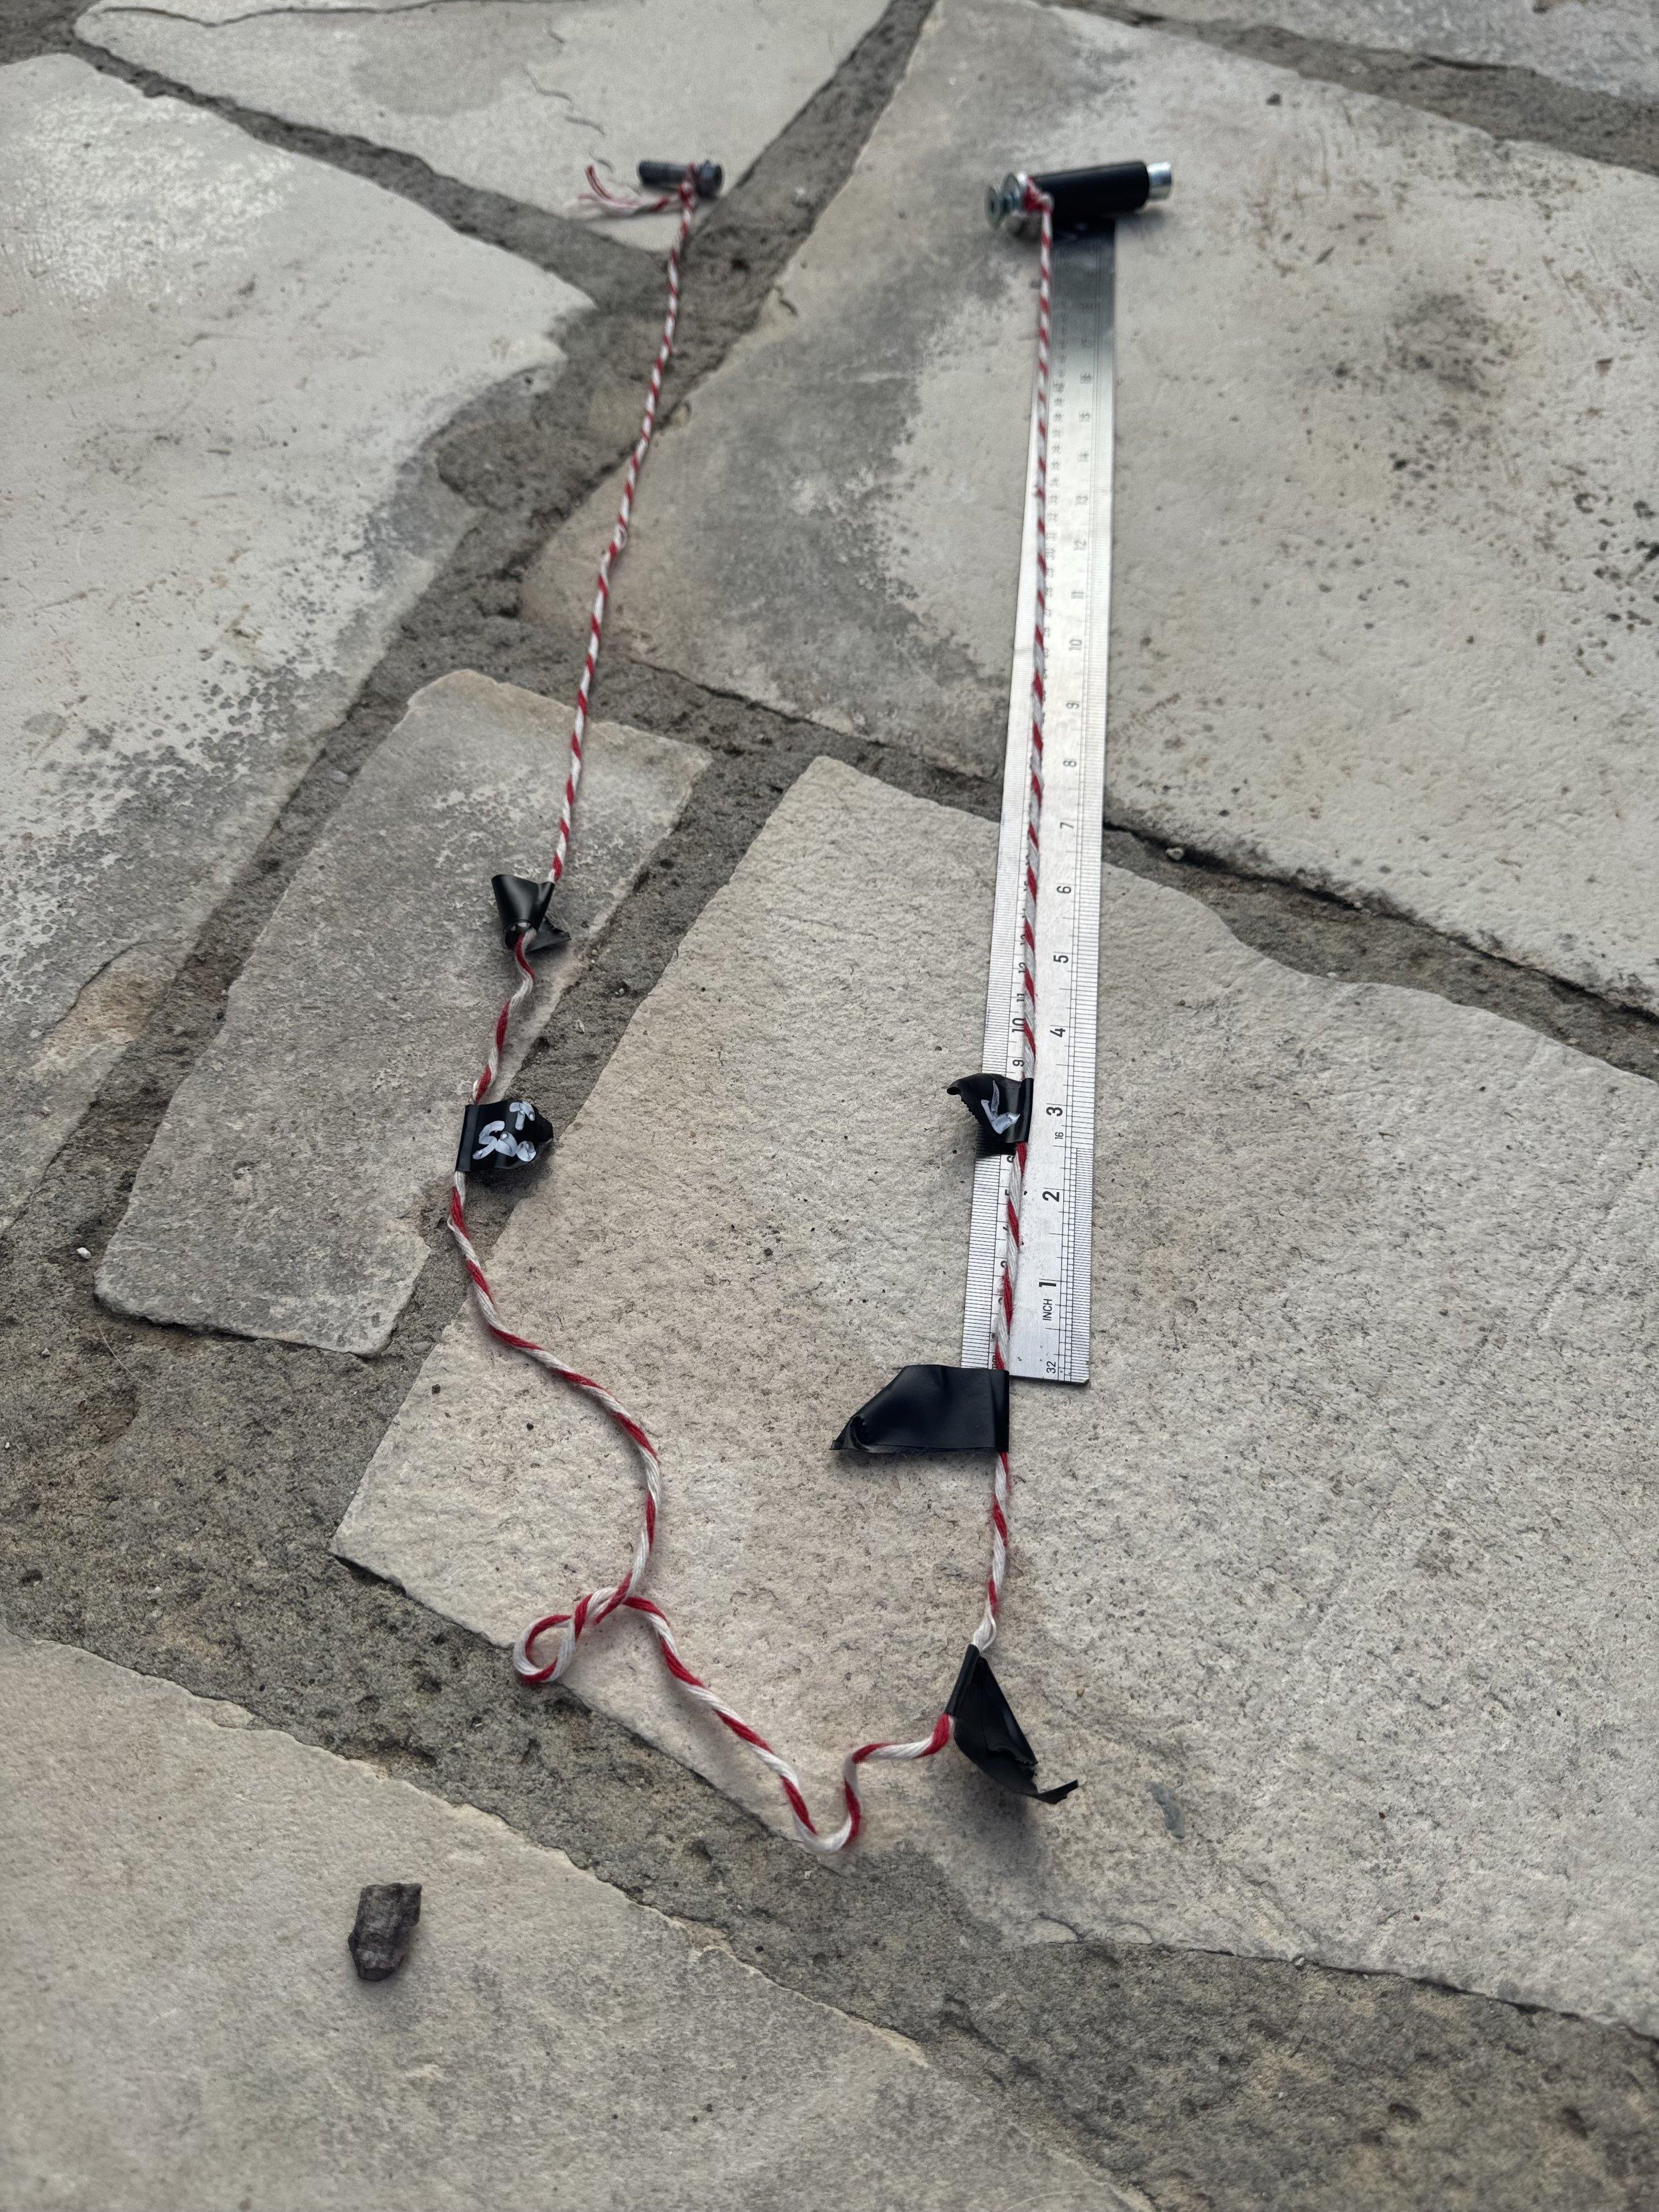
You can measure sag with tape measures and helpers, but I've developed a very simple method using a piece of string approximately 2 metres long (the mystery behind the length will be revealed as part of a cunning plan later on), a couple of suitably sized bolts, a white paint pen and some electrical tape.
The important part is that it's completely repeatable and only requires one sum, precisely once ever. A single number multiplied by 30%. But we'll get to that in a second.
First, we need to establish a permanent measuring point on the motorcycle. A datum you’ll use until the day you sell it.
Take your approximately 2 m piece of string. Hold one end against the centre of the swingarm pivot and extend the string to the centre of the rear axle. Keep the swingarm-pivot end in place and now arc the axle end of the string upwards, keeping the string taut, until it crosses the first convenient piece of bodywork.
Any piece. It genuinely doesn't matter.
What you've done is trace the arc the swingarm would travel through if there were no suspension attached. It's the natural path the rear axle follows, and that's why we do it this way.
There are other methods too, but this is the best.
There! I'm already being controversial.
Where the string crosses the bodywork, make a permanent mark with a white paint pen. I'm not getting religious about the colour; suffice to say that if it's permanent and you can see it, it's fine.
That's your datum.
And that's the clever bit.
Because you've established it using the swingarm pivot → rear axle → bodywork line, you've created a permanent reference point for that motorcycle.
You never, ever need to worry about where to measure again. It's there forever.
No trying to remember which corner of the side panel you used last time. No measuring approximately vertically from the axle. No asking somebody else to hold a tape measure against roughly the same place you used three months ago.
The datum is physically marked on the motorcycle. Every sag measurement you make from now on uses exactly the same point.
Now we can make our actual sag gauge.
Make the gauge
Take the same piece of string — no point wasting perfectly good string — and securely tie a bolt to one end. Choose a bolt that fits neatly into the axle hole in the centre of the rear wheel.
Now get the rear suspension fully extended by lifting the rear wheel off the ground with a suitable stand.
Put the bolt into the axle hole and pull the string taut so that it passes directly across the permanent white datum you've just made on the bodywork.
Put a piece of electrical tape around the string exactly where the string crosses your white mark.
That first piece of tape represents suspension fully extended.
That's one end of our measurement established permanently on the string.
Now we need to work out where the motorcycle should sit when you're actually on it.
What does 30% sag actually mean?
As a rule of thumb, we're aiming for the motorcycle to settle by around 30% of its total rear suspension travel when you're sitting on it in your riding gear, with whatever luggage or other load you're actually setting the bike up to carry.
Some people argue 35%. It makes about 1 cm difference at the end, so arguments are futile. I was always taught 30% as a kid, so that's what I advise now I'm old and grumpy.
The maths isn't exactly taxing.
If your motorcycle has:
200 mm travel → 60 mm sag (200 × 30%)
210 mm travel → 63 mm sag (210 × 30%)
220 mm travel → 66 mm sag (220 × 30%)
230 mm travel → 69 mm sag (230 × 30%)
240 mm travel → 72 mm sag (240 × 30%)
250 mm travel → 75 mm sag (250 × 30%)
Yes, if you were wondering, this IS the one sum you ever needed to do!
So if your motorcycle has 230 mm of rear suspension travel, you're looking for approximately 69 mm of rider sag. In other words, when you sit on the fully loaded motorcycle, we want the rear suspension to settle downward approximately 69 mm from its fully extended position.
And now our string makes this ridiculously easy.
You've already put the first piece of electrical tape on the string at the fully extended position.
For our 230 mm example, put that string on the floor. Measure 69 mm from that first piece of tape towards the bolt.
Put a second piece of electrical tape around the string at exactly that point.
You now have two permanent references on your string:
Tape 1 = suspension fully extended
Tape 2 = where the suspension should sit with you aboard
The 69 mm between those pieces of tape is your target sag.
And once you've made those marks, you don't need to remember 69 mm again.
Forget it forever. No more maths!
Now sit on the bloody thing
Put on your riding kit.
All of it.
If you're setting the motorcycle up to carry luggage, put the luggage on too. If you're setting it up for a particular travelling configuration, reproduce that configuration as closely as you reasonably can. If Mrs Rider wants to come along, sit her on it too.
What we're after is the exact weight as you roll off your drive.
Sit naturally on the motorcycle. It is worth bouncing the suspension up and down a few times. Suspension needs to unstick and sit naturally. This is quite important, by the way.
Now take your Patented Kev Tool — the sag string with the tape on it — put the bolt into the rear axle hole and pull the string taut up to your permanent white datum.
Look at Tape 2.
If Tape 2 has travelled past the white datum and up onto the bodywork, the motorcycle has sagged farther than your target.
You've got too much sag.
Wind on more preload.
If Tape 2 doesn't reach the white datum, the suspension hasn't compressed far enough.
You've got too little sag.
Wind off some preload.
Just incase you aren’t aware how to do that theres two methods. If you are lucky you’ll have a remote preload adjuster. In this case just turn it clockwise for more preload and anti-clockwise for less. If not then it’ll look just like the 450MT. Look at my pictures above.You will see two silver rings on a thread. The top one is there just to lock the bottom one in place so it won’t move. Normally its pretty tight. I use a long flat nosed screwdriver and a hammer. Put the screwdriver on one of those indentations and gently tap it forwards with a hammer, being careful not to attempt to be the Hulk!. It will come loose so wind it away from the bottom ring. Now you need a crescent wrench. The 450MT usefully comes with one. You might need to visit the store to get one. Personally I use the white pen to mark a start point so I can see what I’m doing. Do it slowly, maybe a maximum one full turn and then settle yourself back onto the motorcycle, bounce it and check it again.
When Tape 2 sits right on the permanent white mark, you've achieved your target rider sag.
That's it.
And this is where the method really pays off.
The first time, you've had to establish the datum, find the suspension travel, do the maths and make the gauge.
After that?
Bolt in axle. Sit on bike. String to datum. Look at the tape.
Change your luggage? Check it again. Lose 10 kg? Check it again. Put heavier camping equipment on? Check it again. Different rider? Check it again.
The motorcycle has a permanent datum and the string has a permanent target.
It takes moments.

More preload isn't the same as a stronger spring
There is an important catch.
Preload can help you put the motorcycle in the correct part of its suspension travel.
It cannot perform miracles.
Last year I bought a Voge DS800X Rally.
I was looking for roughly 30% rider sag.
The Voge sagged by around 70%.
Seventy.
That isn't “perhaps I'll give the preload another turn.”
That's the motorcycle disappearing underneath you. I thought I was playing a bit part in Easy Rider.
I eventually managed to get the sag down to 31% by winding on all of the available preload.
Every last bit.
Problem solved?
No.
Because I'd used the entire adjustment range simply to support me.
Add luggage and the bike sags too much again. Add a pillion — even a slim wife — and you're straight back into the same problem.
Except now there is nowhere left to go.
You've already used all the preload.
And that's the point where you need to stop trying to fix the problem with an adjuster.
The spring is too soft.
Preload exists to allow you to establish the correct operating position of the suspension as the load changes. It doesn't magically turn an inadequate spring into the correct spring.
If you cannot achieve sensible rider sag without approaching or reaching the limit of your preload adjustment, do yourself a favour and fit a stronger spring appropriate to your weight and intended load.
I change every 450MT to a stiffer spring at the rear. It's just too weak to cope with what we're asking of it on an off-road adventure. For the technically minded, I increase ours from 80 N/mm to 90 N/mm, and then I can wind preload back off for our lighter guests.
Likewise, if you're at the opposite end of the preload range and still can't obtain the sag you need, your spring may be too stiff.
The objective isn't to achieve 30% at any cost.
It's to have a spring that allows you to achieve the correct sag while still leaving useful adjustment for the real world.
Because sometimes you'll ride alone. Sometimes you'll have luggage. Sometimes you'll have camping equipment.
And sometimes you'll have a wife.
Your suspension needs enough adjustment left to deal with all of them.
So we're finished, you say!
Hurrah, time for a street party!
Not so fast.
You forgot about the front end.
Yes, front suspension has sag issues too.
Now, there are plenty of motorcycles on the market with no front-end preload adjustment. It just comes as it is, with nothing for you to fiddle with. If you're one of those individuals, well done, this article is finished for you. I look forward to you bouncing past me in due course.
For the rest of the class, sit up straight and pay attention, especially you — yes, you at the back hiding behind the copy of MCN.
If your bike has preload adjustment on the forks, then it's every bit as important to get this end of the wagon correct as it was the rear. You can normally tell whether you have it by looking at the top of the fork legs. You'll probably see clickers for compression and rebound, but forget those for now; they come into play during our advanced suspension fiddling session.
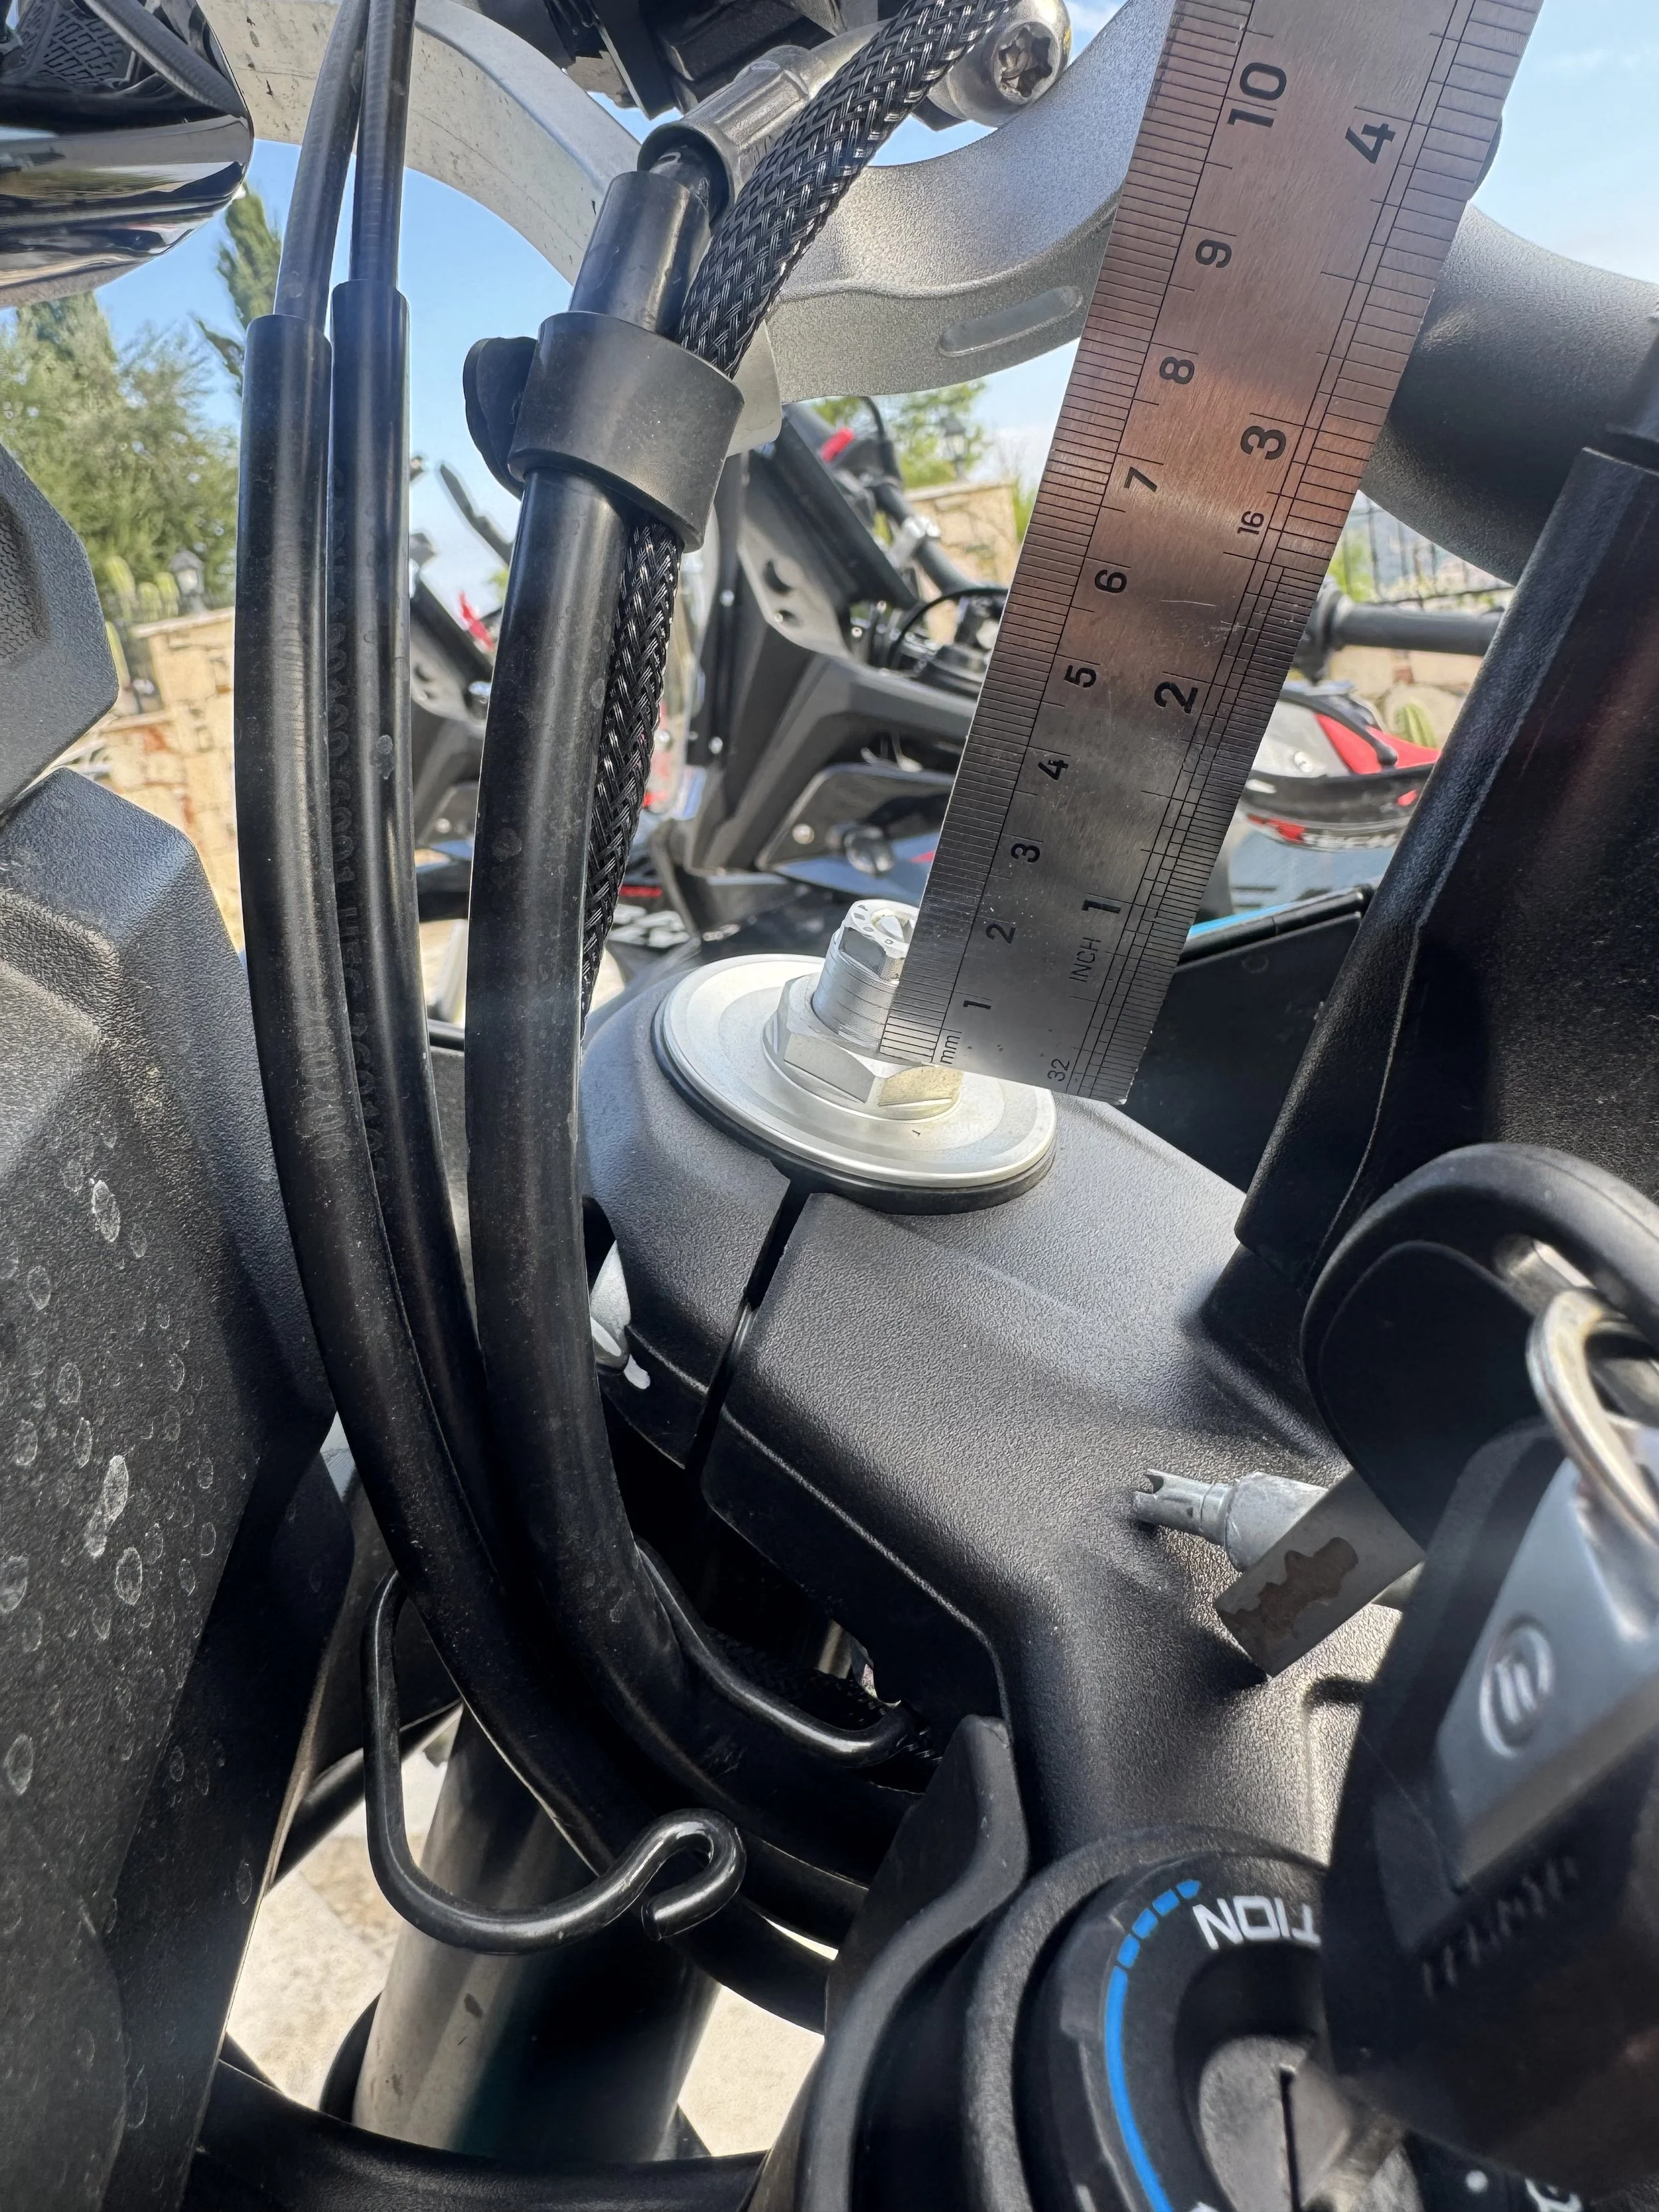
What we're interested in is the nut underneath or surrounding those clickers.
Yes, that nut almost nobody ever touches because they think the fork leg will fall off if they do.
On the 450MT, for instance, it's a 22 mm spanner, although other flavours are available.
That's your preload adjustment.
You'll also notice that there's one on each fork leg, so yes, you're making two adjustments this time and yes, it's important that they're set exactly the same. Otherwise there's a reasonable chance you'll spend the afternoon wondering why you've developed an overwhelming desire to circumnavigate your driveway.
The good thing is that the principle is exactly the same as it was at the rear. We're still looking for approximately 30% sag; it's simply how and where we measure it that's different.
So first, look up the total front suspension travel for your particular motorcycle. I'm not going to lay out the entire maths lesson again because you've graduated now.
Let's use my 450MT as the example. It has 200 mm of front suspension travel, so 30% gives us 60 mm of sag.
Easy.
The cunning plan
And now we finally discover why I insisted earlier that you use that suspiciously long, approximately two-metre piece of string.
We're going to use the other end.
Waste not, want not.
Take the unused end of your string and firmly tie another bolt to it, this time choosing one that fits neatly into the centre of your front axle.
Lift the front wheel just clear of the ground so the forks are completely extended, put the bolt into the axle hole and pull the string taut upwards until it reaches the lower fork clamp.
Where the string meets the clamp, make a permanent mark with your white paint pen.
Or pink.
I really don't care by now.
That mark is your forever datum, exactly as the bodywork mark was at the rear. You will use precisely that same point every time you check the front sag, so once again we've removed the “where the hell did I measure it last time?” problem completely.
With the front wheel still off the ground, pull the string taut from the axle bolt to your new datum and put a piece of electrical tape around the string exactly where it meets the mark.
That's maximum extension.
Now put the string on the floor again. In our 450MT example we want 60 mm of sag, so measure 60 mm from that first piece of tape towards the bolt and put another piece of electrical tape there.
And that's it. You've now done at the front exactly what you did at the rear. The first tape shows maximum extension; the second shows where the suspension should sit when the bike is carrying you and everything you're taking with you.
mount up
Time for rider sag.
Put all your riding gear back on. Add the luggage, camping gear, wife and whatever else you're actually going to ride with.
Then get the motorcycle back onto the ground and mount her.
The bike, not the wife!
Before you measure anything, unstick the suspension. Hold the front brake and bounce the bike up and down a few times, then let it settle naturally.
Now ask your assistant to put the bolt back into the front axle hole and pull the string taut up to the permanent mark on the lower fork clamp.
Where is your second piece of tape?
If it's gone past the datum towards the handlebars, the front has sagged too far, so you need to add preload. If it doesn't reach the datum, you don't have enough sag, so you need to remove preload.
For the avoidance of doubt, it's the old favourite: righty-tighty to add preload, lefty-loosey to reduce it.
The only additional complication at this end is that you've got two fork legs, so make the same adjustment to both. Bounce the suspension again, let it settle and re-measure. Keep going until your second tape mark meets the permanent datum.
When you think you're finished, I like one final idiot check. Take a steel ruler and measure the exposed preload-adjuster thread on each fork leg. Make sure they're exactly the same.
It takes seconds and confirms that you haven't somehow managed to put four turns into one leg and five into the other.
Then you can stop circumnavigating the driveway.
Now we're actually finished
So now you have two final actions to simplify the process for the future.
Firstly, remove the fully extended electrical tape marker at both ends of the string. You don't need those pieces anymore. Their job was simply to help us establish the correct sag positions.
Secondly, take your white paint pen and put an arrow on each of the remaining pieces of electrical tape, pointing towards the edge of the tape furthest away from the bolt.
This sounds ridiculously fussy until you come back three months later and can't remember which edge of a 20 mm-wide piece of electrical tape you were measuring from. Choose the wrong edge and you've just introduced a 20 mm error into a system specifically designed to make your measurements repeatable.
The arrow means you never have to think about it again.
Then wind the string up neatly until the two bolts are sitting beside one another, put an elastic band around it and stick it in your toolkit or under the saddle.
That's your suspension gauge.
One piece of string. Two bolts. Two permanent datums on the motorcycle and two calibrated sag marks on the string. Front and rear suspension can now be checked for the rider and load you're actually carrying in moments.
And my final pleading is: don't forget about it.
Every time you load the motorcycle differently, have a check. Pillion? Check it. Camping equipment? Check it. Different luggage? Check it. Became another Mounjaro success story? Firstly, congratulations. Secondly, check it.
You've done all the work now. The motorcycle has permanent measuring points and the string has the correct front and rear sag positions permanently marked onto it. There is no maths left to do and nothing to remember.
Bolt in the axle, string to the datum, look at the tape.
Considering how dramatically incorrect sag can change the way a motorcycle handles, that's a few moments very well spent.
Good luck.
And now, finally, we can have the street party.
